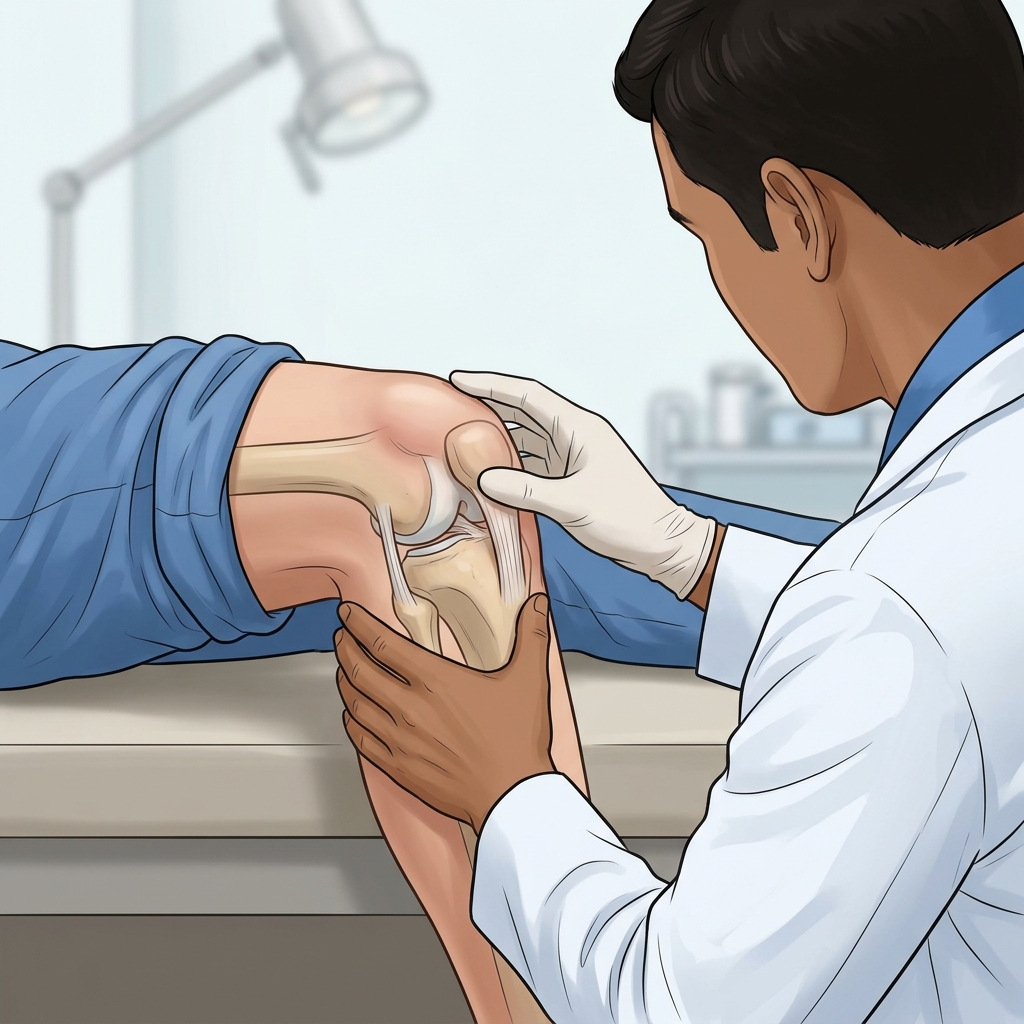
- — Knee aspiration (arthrocentesis) is a safe, minor outpatient procedure that acts as an immediate mechanical pressure-release valve for a swollen joint.
- — Needle pain anxiety is minimized by applying a tiny 25-gauge or 30-gauge skin wheal of 1% lidocaine, completely numbing the joint capsule before fluid withdrawal.
- — Point-of-Care MSK Ultrasound (POCUS) guidance ensures sub-millimeter needle accuracy, avoiding cartilage or bone contact and achieving over 95% procedure success.
- — Extracting 30 mL to 60 mL of trapped synovial fluid instantly collapses intra-articular pressure from toxic levels (>50 mmHg) back to a comfortable resting baseline (0 to 2 mmHg).
Discovering that your knee has swollen into a tight, balloon-like mass can cause profound anxiety. When simple movements like walking, stepping down stairs, or bending your leg produce a heavy, dull ache accompanied by a catching sensation, many patients suffer in silence out of fear of medical needles. Scientifically referred to as arthrocentesis—and commonly called knee joint aspiration or draining fluid from the knee—this minor outpatient procedure is one of the most effective, immediate relief interventions in physical medicine and rehabilitation.
In my clinic, I look for signs of severe capsular pressure when patients arrive complaining of a knee that feels stiff, heavy, or locked. On patient community forums like Reddit and YouTube, individuals frequently express intense fear that draining fluid from the knee will be agonizingly painful. In my practice, I reassure anxious patients that modern ultrasound-guided knee aspiration combined with a tiny 25-gauge or 30-gauge local anesthetic skin wheal turns what people dread into a calm, virtually painless experience that provides instant physical comfort. Below, we break down the step-by-step procedure, explain how local anesthesia works, and detail why real-time ultrasound imaging is essential for joint health.
What is Knee Arthrocentesis? Mechanics of Joint Fluid Evacuation
Knee arthrocentesis is a sterile clinical technique where a physiatrist or orthopedic specialist inserts a fine needle into the synovial cavity of the knee joint to evacuate abnormal accumulations of fluid. Under normal anatomical conditions, the knee joint capsule holds a minimal volume—approximately 2 mL to 5 mL—of clear, viscous synovial fluid designed to lubricate articular cartilage and absorb mechanical impact.
When joint structures experience acute mechanical trauma (such as a meniscus tear or ligament sprain) or severe biochemical inflammation (such as osteoarthritis wear or a gout flare-up), the synovial membrane lining overproduces fluid. As fluid volume expands to 30 mL, 60 mL, or even 100 mL, hydrostatic pressure inside the sealed joint capsule surges from a normal resting baseline of 0 to 2 mmHg up to toxic pressure levels exceeding 50 mmHg.
This extreme capsular tension fires continuous high-frequency inhibitory signals to the spinal cord, triggering Arthrogenic Muscle Inhibition (AMI). AMI paralyzes voluntary motor recruitment of the quadriceps muscle by 30% to 90%, causing leg weakness, gait limping, and a burning, tingling discomfort around the patella. Knee aspiration acts as an immediate mechanical pressure-release valve, collapsing internal capsular tension and allowing the quadriceps muscle to re-engage instantly.
Does Knee Aspiration Hurt? Demystifying the Needle & Anesthetic Shield
The single greatest barrier preventing patients from seeking fluid decompression is the fear of procedural pain. Much of this fear stems from outdated internet stories or memories of un-numbed emergency room procedures. In modern physiatry practice, patient comfort is an absolute clinical priority.
Understanding the two-stage needle protocol highlights why the procedure is surprisingly comfortable:
- Stage 1: The Anesthetic Skin Wheal (25G or 30G Needle): Before any fluid extraction takes place, we use an ultra-fine 25-gauge or 30-gauge needle—the same microscopic gauge used for insulin injections—to deposit a small skin wheal of 1% lidocaine local anesthetic. You feel a brief 3-second pinprick on the skin surface, followed by a mild cooling sensation as the anesthetic numbs the cutaneous nerves and the underlying joint capsule.
- Stage 2: The Aspirating Needle (18G or 20G Needle): Once the joint capsule is completely anesthetized (typically within 10 to 15 seconds), the larger 18-gauge or 20-gauge aspirating needle is guided through the pre-numbed tissue track. Because the nerve pathways are fully blocked, you do not feel sharp needle pain; instead, you feel only mild tactile pressure as the needle tip enters the fluid space.
Step-by-Step Walkthrough: What Happens During Your Appointment
In our Vigan clinic, we walk every patient through each phase of the procedure to eliminate surprise and build complete confidence:
- Patient Positioning & Supine Comfort: You lie comfortably in a supine position on the examination table with a small bolster pillow placed behind your knee to maintain a relaxed 20 to 30-degree flexion angle. This opens the suprapatellar bursa for optimal anatomical access.
- Real-Time POCUS Ultrasound Scanning: Using a high-frequency linear ultrasound probe, we perform a Point-of-Care MSK Ultrasound (POCUS) scan of the suprapatellar pouch. We locate the exact depth, volume, and echogenicity of the anechoic (dark) fluid pocket on the monitor.
- Sterile Skin Preparation: The skin over the lateral suprapatellar margin is cleansed with chlorhexidine or povidone-iodine solution, and a sterile fenestrated drape is applied.
- Targeted Local Anesthesia: Under ultrasound visualization, a tiny 25G/30G skin wheal of 1% lidocaine is administered, numbing the tract from skin down through the joint capsule.
- Ultrasound-Guided Needle Insertion: Using a superolateral approach, the sterile 18G/20G aspirating needle is inserted. On the ultrasound monitor, we watch the bright, echogenic needle tip slide smoothly into the center of the dark fluid pocket without touching sensitive articular cartilage or periosteum.
- Fluid Evacuation & Pressure Release: As the syringe plunger is gently drawn back, straw-colored or turbid synovial fluid fills the syringe. Within seconds, as 30 mL to 60 mL of fluid is evacuated, capsular hydrostatic pressure drops to zero. Patients routinely experience a palpable rush of physical relief and lightness in the knee.
- Sterile Bandage & Post-Procedure Inspection: The needle is gently withdrawn, a small sterile adhesive bandage is applied, and we perform a post-procedure ultrasound scan to confirm total fluid collapse.
Ready for Painless Pressure Relief?
Don't let needle anxiety keep you living with a tight, swollen knee. Experience gentle, ultrasound-guided fluid aspiration with Dr. Rabara today.
Comparative Analysis: Blind Landmark vs. Ultrasound-Guided Aspiration
The table below illustrates why real-time ultrasound guidance (POCUS) is superior to traditional blind landmark aspiration in patient safety, comfort, and clinical accuracy:
| Clinical Feature / Metric | Blind Landmark Aspiration | Ultrasound-Guided Aspiration (POCUS) |
|---|---|---|
| Procedural Accuracy Rate | 70% to 80% (Higher risk of dry tap or missed fluid) | >95% to 100% (Real-time needle tip visualization) |
| Cartilage & Bone Protection | Moderate; needle relies on tactile bone contact | Maximum; needle tip is continuously tracked away from cartilage |
| Patient Pain Perception | Higher (Blind repositioning increases tissue trauma) | Minimal (Single pre-numbed ultrasound-guided entry) |
| Evacuation Completeness | Partial (Cannot visualize loculated fluid pockets) | Complete (Visual confirmation of total capsular collapse) |
| Diagnostic Yield | Variable | High (Ensures adequate synovial fluid volume for lab analysis) |
Diagnostic Synovial Fluid Analysis: What Your Fluid Tells Us
Beyond providing immediate physical decompression, knee aspiration serves a vital diagnostic purpose. The physical appearance and laboratory analysis of the evacuated synovial fluid provide clear clinical clarity regarding the underlying disease process:
- Clear to Light Straw-Colored Fluid (Normal / Non-Inflammatory): Indicates mild mechanical irritation or early non-inflammatory osteoarthritis.
- Cloudy or Deep Yellow Fluid (Inflammatory): Suggests active inflammatory synovitis, such as an acute gout flare-up, pseudogout, or rheumatoid arthritis. White blood cell count ranges from 2,000 to 50,000 cells/mcL.
- Turbid, Opaque, or Purulent Fluid (Septic / Infection): Indicates a medical emergency such as septic arthritis, with white blood cell counts exceeding 50,000 to 100,000 cells/mcL and immediate Gram stain culture required.
- Frank Bloody Fluid (Hemarthrosis / Lipohemarthrosis): Points to acute structural trauma, such as an ACL tear, meniscus root tear, intra-articular fracture, or patellar dislocation. Fat globules floating on top of blood (lipohemarthrosis) confirm an occult intra-articular bone fracture.
Post-Procedure Aftercare & Recovery Expectations
Recovery following an ultrasound-guided knee aspiration is rapid and straightforward. In my practice, I recommend following these post-procedure guidelines:
- Keep Bandage Clean & Dry: Maintain the small sterile adhesive bandage over the puncture site for 24 hours. Showering is permitted after 24 hours.
- Relative Rest for 24 to 48 Hours: Avoid strenuous physical exertion, heavy weightlifting, deep squatting, or prolonged standing for 1 to 2 days following fluid removal.
- Ice Pack Application: If minor soreness occurs at the puncture site as the local anesthetic wears off (typically after 2 to 4 hours), apply a cold ice pack wrapped in a towel for 15 minutes every 3 to 4 hours.
- Resume Physical Therapy: With intra-articular pressure collapsed and quadriceps inhibition resolved, patients can resume structured physical therapy and targeted strengthening to rebuild leg strength safely.
Transparent Pricing & PhilHealth Coverage in Vigan City
At TeraCare Physical Medicine & Rehabilitation Clinic in Vigan City, we maintain total financial transparency for outpatient procedures:
- Standalone Ultrasound-Guided Knee Aspiration: ₱2,999 (Includes diagnostic MSK ultrasound scanning, local anesthesia, and complete fluid evacuation).
- Combined Aspiration + Anti-Inflammatory Injection: ₱5,999 (Includes fluid evacuation plus ultrasound-guided therapeutic corticosteroid injection to prevent fluid re-accumulation).
- 100% PhilHealth Coverage: These outpatient procedures are fully covered by PhilHealth under RVS Code 20610 for eligible members with formal medical orders.
Schedule Your Ultrasound-Guided Aspiration
Take the fear out of joint fluid removal. Book your consultation with Dr. Rabara today for gentle, precise, and immediate pressure relief.
Clinical Realities of Knee Arthrocentesis
Understanding the procedural science and immediate benefits of fluid evacuation.
Anesthetic Shields Needle Sensation
A tiny 25G or 30G lidocaine skin wheal numbs the capsule in seconds, turning what patients fear into a virtually painless pressure relief experience.
Ultrasound Eliminates Blind Guesswork
Real-time POCUS imaging tracks the needle tip directly into the suprapatellar bursa, guaranteeing complete evacuation without touching articular cartilage.
Instant Muscle Unlocking (AMI Collapse)
Removing 30 mL to 60 mL of fluid drops intra-articular pressure from >50 mmHg to baseline, instantly restoring quadriceps motor unit recruitment.
References & Clinical Evidence
- [1] Elsawy AM, et al. Diagnostic accuracy of point-of-care ultrasound versus clinical physical examination for detection of knee joint effusion. BMC Musculoskelet Disord. 2023. PMID: 10257372.
- [2] Dainese P, Wyngaert KV, De Mits S, Wittoek R, Van Ginckel A, Calders P. Association between knee inflammation and knee pain in patients with knee osteoarthritis: a systematic review. Osteoarthritis Cartilage. 2022 Apr;30(4):516-534. doi: 10.1016/j.joca.2021.12.003. PMID: 34968719.
- [3] Sukerkar PA, Doyle Z. Imaging of Osteoarthritis of the Knee. Radiol Clin North Am. 2022 Jul;60(4):583-596. doi: 10.1016/j.rcl.2022.03.004. PMID: 35672093.
- [4] Aiyer R, et al. Therapeutic Ultrasound for Chronic Pain Management in Joints: A Systematic Review. Pain Med. 2020. PMID: 31095336.
* Clinical references are provided to support the medical claims made in this article. TeraCare adheres to evidence-based practices in physical medicine and rehabilitation.

Dr. Ben Rabara
Dr. Ben Rabara is a Board-Certified Physiatrist specializing in Physical Medicine and Rehabilitation. He focuses on non-surgical, precision treatments for musculoskeletal conditions, utilizing advanced diagnostics like MSK Ultrasound.
Medical Disclaimer: The information provided in this article is for educational purposes only and does not substitute for professional medical advice, diagnosis, or treatment. Always consult a qualified physician for your specific health conditions.